Self-signed certificate
Self-Signed Certificate History (from Wikipedia)
In cryptography and computer security, a self-signed certificate is an identity certificate that is signed by its own creator. That is, the person that created the certificate also signed off on its legitimacy.
In typical public key infrastructure (PKI) arrangements, that a particular public key certificate is valid (i.e., contains correct information) if attested by a digital signature from a certificate authority (CA). Users, or their software on their behalf, check that the private key used to sign some certificate matches the public key in the CA’s certificate. Since CA certificates are often signed by other, “higher ranking,” CAs, there must necessarily be a highest CA, which provides the ultimate in attestation authority in that particular PKI scheme.
Obviously, the highest-ranking CA’s certificate can’t be attested by some other higher CA (there being none), and so that certificate can only be “self-signed.” Such certificates are also termed root certificates. Clearly, the lack of mistakes or corruption in the issuance of such certificates is critical to the operation of its associated PKI; they should be, and generally are, issued with great care.
In a web of trust certificate scheme there is no central CA, and so identity certificates for each user can be self-signed. In this case, however, it has additional signatures from other users which are evaluated to determine whether a certificate should be accepted as correct. So, if users Bob, Carol, and Edward have signed Alice’s certificate, user David may decide to trust that the public key in the certificate is Alice’s (all these worthies having agreed by their signatures on that claim). But, if only user Bob has signed, David might (based on his knowledge of Bob) decide to take additional steps in evaluating Alice’s certificate. On the other hand, Edward’s signature alone on the certificate may by itself be enough for David to trust that he has Alice’s public key (Edward being known to David to be a reliably careful and trustworthy person). There is of course, a potentially difficult regression here, as how can David know that Bob, Carol, Ted, or Edward have signed any certificate at all unless he knows their public keys (which of course came to him in some sort of certificate)? In the case of a small group of users who know one another in advance and can meet in person (e.g., a family), users can sign one another’s certificates when they meet as a group, but this solution does not scale to larger settings. This problem is solved by fiat in X.509 PKI schemes as one believes (i.e., trusts) the root certificate by definition.[dubious – discuss] The problem of trusting certificates is real in both approaches, but less easily lost track of by users in a Web of Trust scheme.
How To Create a Self-signed SSL Certificate for II6 (Windows Server 2003)
This tutorial explains step by step how to create a Self-signed SSL Certificate on Windows Server 2003. There are many ways to do it. This is the way I do it and suggest to others as one of the easiest, reliable and straight forward solution to install a Self-signed SSL Certificate on IIS6.
Prerequisites
To get started you need to have a general knowledge about Windows Server Administration and IIS6. Obviously, to continue with the tutorial you need an installed Windows Server 2003 and IIS6 configured on the server. Also, make sure the server is configured with the right IP Address and has an Internet Connection.
1. Open a browser of your choice and download IIS6.0 Resource Kit Tools from official
Microsoft Downloads website.


2. Once downloaded click Run to Install the Application

3. Agree with the EULA
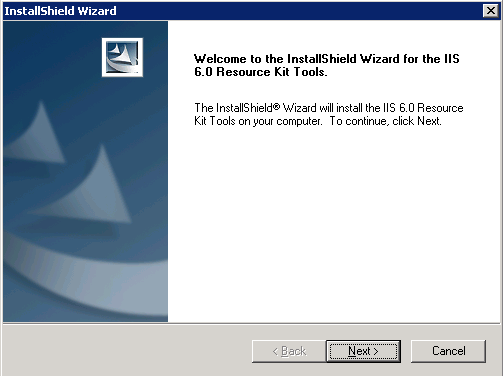
4. Select Custom Setup Type

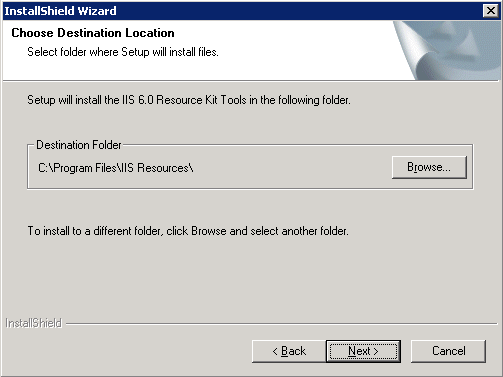
5. Choose Destination folder for the files or use the default option
6. You can uncheck all the Tools and leave only SelfSSL 1.0

7. Click again Next to install the Tools
8. Once installed, click Start > All Programs > IIS Resources > SelfSSL > Run SelfSSL Tool

9. Before you can proceed further you need to find the Website ID that you want to assign the SSL.
a. Open IIS
b. Navigate to Web Sites
c. Look for Identifier number of your web site
d. If you want to assign SSL to “Default Web Site” ID would be 1

10. Now run the following command in the Command Prompt:
selfssl /N:CN=www.aspnix.com /K:2048 /V:365 /S:1 /T
a. replace www.aspnix.com with your domain
b. /K: is the key size – 2048 is recommended
c. /V: days of validity – 365 is recommended
d. /S: number for your web site identifier in IIS
e. /T makes the certificated trusted
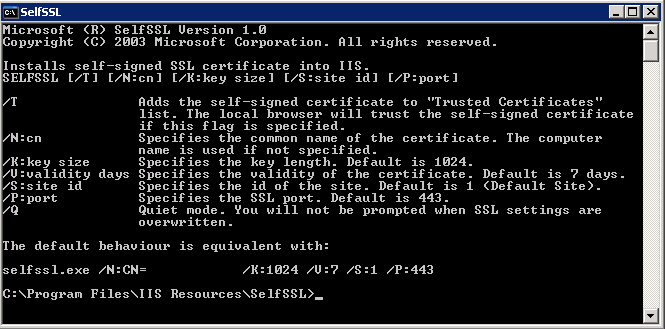
11. Once you run the command confirm it with Y then press ENTER:
Do you want to replace the SSL settings for site 1 (Y/N)? Y
12. If successful you will see this message:
The self signed certificate was successfully assigned to site 1.
13. Your Self-signed SSL has been installed. You can verify it by going IIS > Web Sites > Default Web Site (or any site you assigned it to), right click > Properties > Directory Security > View Certificate


Congratulations! You have just successfully installed a Self-signed SSL Certificate!


